Accucom Blog
How to Work with Web-Based Images, Part 2: Resizing

It wasn’t long ago that we shared a post that described the most common formats used to share image media online or via your email. The idea is to make sure the images you generate are contained in the smallest amount of space possible (or a smaller file size) to make them quick and easy to share and download—the trick is to do it without sacrificing any image quality.
Let’s go over how to do just this while using the most common image editing program out there: Adobe Photoshop (although the same process should work for just about any application you use).
Resizing and Optimizing an Image for the Web
Let’s assume that we want to feature an image of a coffee shop on your website. Loaded in Photoshop, that image would look like this:
See the percentage displayed next to the file name? In our example, it says 16.7%. This means that the image we’re looking at on screen is zoomed out to the point that 16.7 percent of its pixels are visible—not that pixels are off-screen, but that the image is zoomed out to the point that not all the details are visible.
(By the way, there are a few different ways to zoom in and out while using Photoshop. The easiest? Holding down CTRL and Spacebar while left-clicking to Zoom In, and holding down CTRL, Alt, and Spacebar while left-clicking to Zoom Out.)
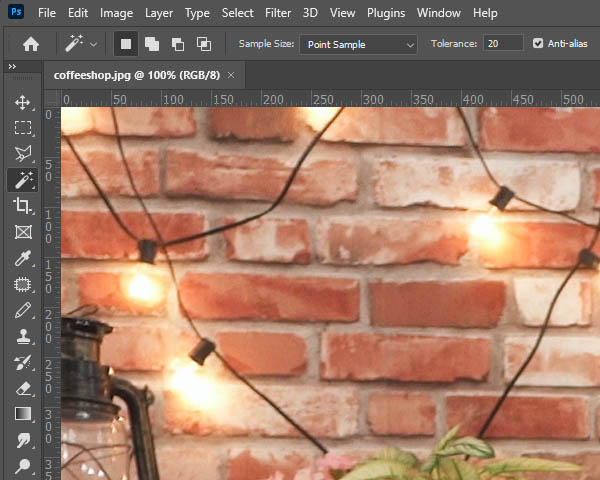
Let’s take a look at the same image, viewed at 100% Zoom:
From here, it’s clear that we’re only looking at a small portion of the entire image when zoomed-in to 100 percent.
So, what does this tell us?
In so many words: this is a big image.
Remember, zooming in and out doesn’t change the size of the image—all we did was change how much of the image is displayed on the screen. At this zoom, this image in particular scales beyond the space available on our hypothetical monitor.
This is actually a good sign, as it shows us the quality of our image is good, with a lot of potential if we were to print it. However, for use on a website, this massive image is just too big.
Most of the images you’ll come across on stock websites or that have been taken with digital photography will be of simply massive design.
Another reason this is good? You should exclusively shrink images down to resize them. Assuming it’s possible in the first place, blowing up a small image properly will require a graphic designer’s touch to prevent too much loss in terms of image quality.
Before anything else, you also want to make sure to save an untouched copy of the original image, like we said in part one.
Step 1 – Figuring Out the Size
This step can be tricky without some background in graphic design. For your website, exactly where the image is going will play some role. You may need to just eyeball it or go through some trial and error to figure out the right size.
However, there’s also a pretty neat trick you can do with the Firefox browser, as long as you’re replacing an image that’s already there.
- Load up Firefox and navigate to the page you want to put the new image.
- Right-click the image you want to replace and go to View Image Info.
- A window will pop up displaying your image and some information about it.
- Look for Dimensions. That will show you the width and height of the image in pixels.
- You can use that as a reference for the new image.
If you’re eyeballing it, here’s some comparisons:
- 3840px is the width of a 4k Ultra HD monitor or television screen.
- 1920px is the width of a standard high-definition monitor or television screen.
- 1080px is the width of most Instagram images.
- 820px is the width of a Facebook Cover Image on a desktop or most laptops.
- 272px is the width of Google’s logo in the center of Google.com on most desktops and laptops.
If you’re reading this blog on your desktop, here are the sizes that each dimension will appear as onscreen (unfortunately, these don’t really apply to smartphone displays):
Step 2 – Have Photoshop Zoomed to 100%
In the bottom left corner of Photoshop, below your image, you’ll find the Zoom percentage. Click the percentage and make sure it is set to 100%. You can also change it by Zooming In by holding down CTRL and Spacebar while left-clicking the image and Zooming Out by holding down CTRL, ALT, and Spacebar while left-clicking the image.
This is a good way to get a good appreciation for how large or small the image will actually appear and make it easier to estimate its size accurately.
Step 3 - Resize Your Image Accordingly
Clicking on the Image Menu, go to Image Size.
You should see a window like this:
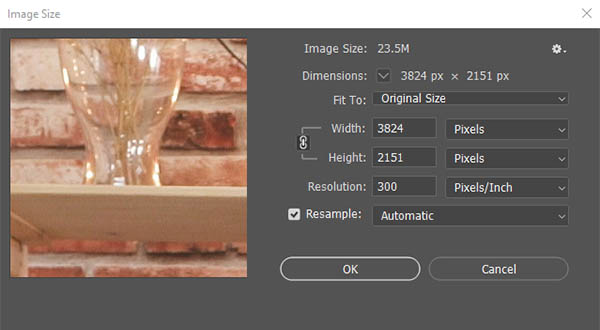
As you’re in the Image Size window:
- Make sure that the Width and Height are set to Pixels (as opposed to inches, centimeters, etc.)
- Make sure the brackets next to the link icon (pointing at Width and Height) are on. Clicking on the link icon will toggle this. This will ensure that you keep the same proportions of the image while you resize it.
- Type in the new width or height you want to shrink the image down to. If you change one field, the other should change with it.
- Most often, leaving Resample checked, and keeping it on Automatic will be your best bet.
- Click OK to resize your image.
Step 4 - Save Your Newly Resized Image
Finally, the time has come to save the image. In the last blog, we discussed different image formats to consider using. As we’re working with a photograph, JPEG is probably the best bet.
In Photoshop, go to File > Export > Export As. After clicking it, the Export As window should appear:
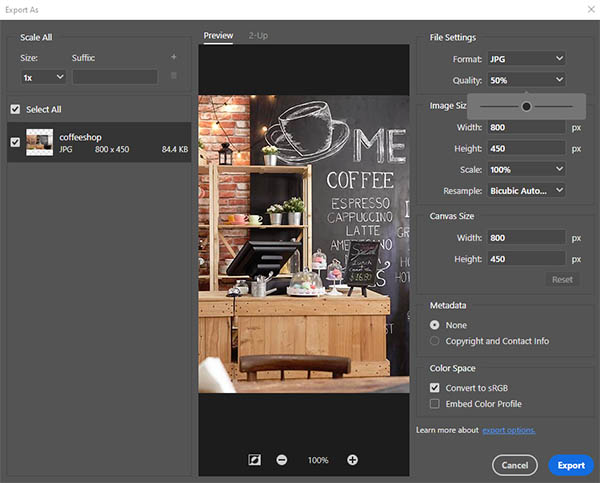
There, you’ll see a preview of your image. Zoom your image to 100 percent using the + and - icons at the bottom center.
Under File Settings, make sure your Format is set to JPG.
Set the Quality by dragging the slider to the left while keeping an eye on the preview image. If you start to notice the image degrade in quality, stop, and nudge the slider to the right to correct it.
Each image will be a little different, but you should usually be able to set the quality somewhere between 40-and-70 percent without degrading how the image looks. This is more important than you’d think, as the quality slider is what determines the file size of the image. Users will be able to download the image faster if the file size is kept as low as possible but going too low will cause the image to look over-compressed.
Look to where high-contrast colors meet in your image to check for degradation. Look for light and dark objects. With the quality too low, weird artifacting and shapes will start to appear around hard edges.
Once satisfied with your work, click Export and you’ll be prompted to give your new image a file name. Remember to change it so you don’t save over the original!
Hopefully, this guide has helped teach you a little something. To learn more handy tips and tricks, make sure to check back to our blog—and for more practical assistance, give our IT experts a call at (02) 8825-5555.
About the author


Comments